-
제로부터 시작하는 Node.js - 10. Express 모듈 - 2 (미들웨어 1)내가 보기 위해 쓰는 것/Node.js 2019. 11. 7. 16:28
이 글은 주요한 미들웨어를 주로 다루겠습니다.
1. 개요
지난 글에서 Express 모듈의 기본적인 내용에 대해서 알아보았지만, 이 내용만으로는 http모듈과 Express 모듈의 차이를 크게 느끼긴 힘들었습니다. 와닿는 정도는 Express 모듈은 use 메서드를 사용한다는 것입니다.
use메서드가 http모듈의 request이벤트리스너와 무엇이 다를까요?
일단 use메서드는 여러번 사용할 수 있으며, request, response 이외에 세번째 매개변수로 next를 사용할 수 있습니다.
next는 해당 use메서드의 다음에 위치한 함수를 뜻합니다.
예제로 살펴보겠습니다.
const express = require('express')

const app = express()

app.use( function (req, res, next) {
  console.log('첫번째 미들웨어 입니다.')
})

app.use( function (req, res, next) {
  console.log('두번째 미들웨어 입니다.')
})

app.use( function (req, res, next) {
  console.log('세번째 미들웨어 입니다.')
  res.end('<h1>HEEELLLLOOO</h1>')
})

app.listen(3001, function() {
  console.log('Server is Running at http://127.0.0.1:3001')
})
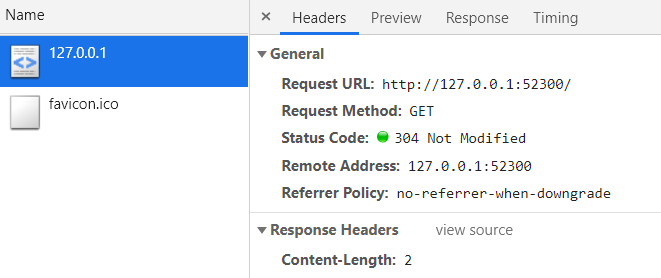
브라우저로 요청을 하면 이런 결과가 나옵니다. 하지만 여기서 저희가 더 주목해야 할 것은 터미널입니다.
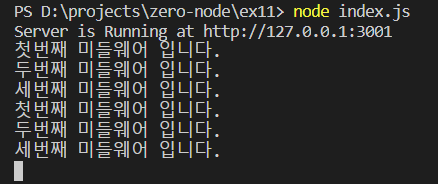
순서대로 실행되었습니다. 두 번 실행된 것은 favicon request도 있기 때문입니다.
유저 요청에 응답하기 전, 단계를 나눠 일을 처리할 수 있습니다. 이렇게 use 메서드 매개변수에 들어가는 함수를
미들웨어 라고 합니다.
미들웨어의 특징과 사용할 시 얻을 수 있는 이점 중 하나를 설명드리겠습니다.
미들웨어에서 request와 response객체에 멤버를 추가하면, 다른 미들웨어에서도 사용할 수 있습니다.
예를 하나 들어보겠습니다.
const express = require('express')

const app = express()

app.use( function (req, res, next) {
  req.numb = 2
  res.numb = 3
  console.log('첫번째 미들웨어 입니다.')
  next()
})

app.use( function (req, res, next) {
  console.log('두번째 미들웨어 입니다.')
  console.log(req.numb + ' + ' + res.numb + ' = ' + (req.numb + res.numb) )
  next()
})

app.use( function (req, res) {
  console.log('세번째 미들웨어 입니다.')
  res.sendStatus(200)
  res.end('<h1>HEEELLLLOOO</h1>')
})

app.listen(52300, function() {
  console.log('Server is Running at http://127.0.0.1:52300')
})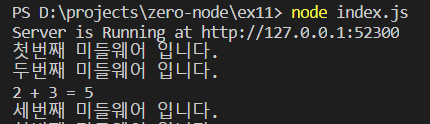
이렇게 재사용성도 제공하기 때문에 더욱 구조적이고 재사용성 높은 코드를 짤 수 있게 됩니다.
이제 주요한 미들웨어 몇을 소개하겠습니다.
2. router 미들웨어
express 모듈은 페이지 라우팅을 지원합니다. 페이지 라우팅 기능은 express 모듈에 내장되어 있기 때문에 미들웨어라고 인지 하지 못할수도 있습니다.
어쨋든 페이지 라우팅은 클라이언트의 요청에 따라 적절한 페이지로 응답하는 기술입니다.
http모듈을 사용했을 때는 if문을 사용해 라우팅을 구현했지만, express의 router미들웨어를 이용하면 더욱 쉽게 페이지 라우팅을 구현할 수 있습니다.
router 미들웨어의 메서드는 아래와 같습니다.
메서드 설명 get(path, callback, callback...) GET 요청이 발생했을 때의 이벤트 리스너 post(path, callback, callback...) POST 요청이 발생했을 때의 이벤트 리스너 put(path, callback, callback...) put 요청이 발생했을 때의 이벤트 리스너 delete(path, callback, callback...) delete 요청이 발생했을 때의 이벤트 리스너 all(path, callback, callback...) all 요청이 발생했을 때의 이벤트 리스너
get 메서드를 사용해봅시다.const express = require('express') const app = express() app.get('/one', function (req, res) { res.send('<a href="/two">Go to two</a>') }) app.get('/two', function (req, res) { res.send('<a href="/one">Go to one</a>') }) app.listen(52300, function() { console.log('Server is Running at http://127.0.0.1:52300') })http://127.0.0.1:52300/one 에 접속하면 결과가 나옵니다.

a태그를 클릭해 페이지를 오갈 수 있습니다.
사용법이 비교적 간단한데, 여기에 express 모듈의 라우팅에는 추가적인 좋은 기능이 하나 더 있습니다.
바로 토큰을 사용할 수 있다는 것입니다.
예제를 보시면 이해가 빠르실 겁니다.
const express = require('express')

const app = express()

app.get('/one/:name', function (req, res) {
  res.send('<H1>' + req.params.name + ', Hello !</H1>')
})
app.listen(52300, function() {
  console.log('Server is Running at http://127.0.0.1:52300')
})
http://127.0.0.1:52300/one/이름 으로 접속합니다.
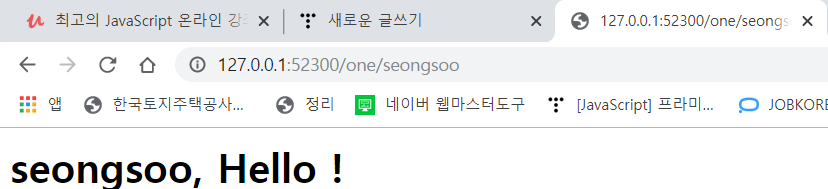
값을 쉽게 전달받았습니다.
참고로 라우팅에 첫번째 매개변수에 전체 선택자 ( * ) 을 사용할 수 있습니다.
라우팅은 순서대로 요청을 확인함으로 가장 마지막에 위치해두면 없는 페이지에 접속했을 경우를 대비할 수 있겠습니다.
마지막으로 router 모듈화에 대해서 설명하겠습니다.
실제 프로젝트에선 파일을 분리해 각각의 라우터를 만들어 합치는 방법을 많이 쓴다고 합니다.
const express = require('express')

const app = express()

const routerA = express.Router()
const routerB = express.Router()

routerA.get('/index', function (req, res) {
  res.send('<h1>router a: index</h1>')
})

routerB.get('/index', function (req, res) {
  res.send('<h1>router b: index2</h1>')
})

app.use('/a', routerA)
app.use('/b', routerB)

app.listen(52300, function () {
  console.log('server is Running at http://127.0.0.1:52300')
})
이렇게 하면
http://127.0.0.1:52300/a/index
http://127.0.0.1:52300/b/index
두개의 경로가 생깁니다. '/a'의 응답함수를 routerA로, '/b의 응답함수를 routerB로 설정했습니다.
그럼 실제 프로젝트에서 사용한다는 파일분리형 라우터구조도 살펴보겠습니다.
router.js, index.js 로 파일 두개를 준비합니다.
router.js 입니다.
const express = require('express')
const router = express.Router()

router.get('/index', function (req, res) {
  res.send('<h1>Index Page</h1>')
})

exports.router = router
index.js 입니다.
const express = require('express')

const app = express()

app.use('/a', require('./router').router)

app.listen(52300, function () {
  console.log('server is Running at http://127.0.0.1:52300')
})
http://127.0.0.1:52300/a/index 에 주소가 생기게 됩니다.
2. static 미들웨어
static 미들웨어도 express 모듈 자체에 내장되어있으며 사용법도 비교적 간단합니다.
static 미들웨어는 지정한 폴더를 웹 서버 루트로 올려줍니다.
간단한 예제로 알아보겠습니다
파일 구성입니다.
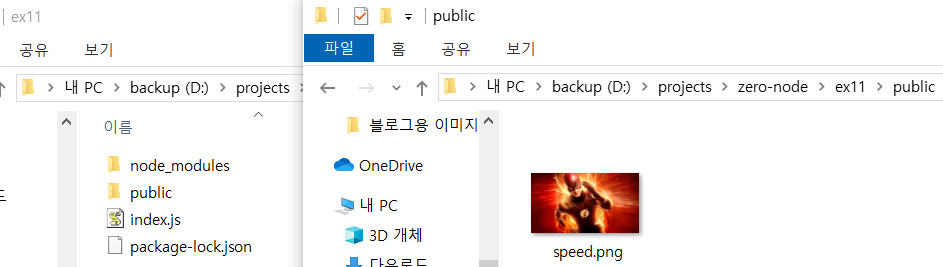
index.js 입니다.
const express = require('express')

const app = express()

app.use(express.static(__dirname + '/public'))
app.use(function (req, res) {
  /* res.writeHead('200', { 'Content-Type': 'text/html' }) */
  res.send('<img src="/speed.png" width="150" />')
})

app.listen(52300, function () {
  console.log('server is Running at http://127.0.0.1:52300')
})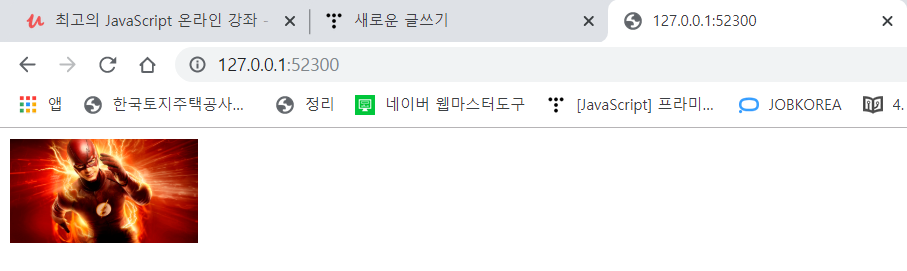
3. cookie parser 미들웨어
cookie parser 미들웨어는 쿠키를 추출하는 미들웨어입니다.
이 미들웨어를 사용하면 request, response 객체에 cookies 속성과 cookie() 메서드가 생깁니다.
이 미들웨어는 설치가 필요합니다.
npm install --save cookie-parser
간단한 예제입니다.
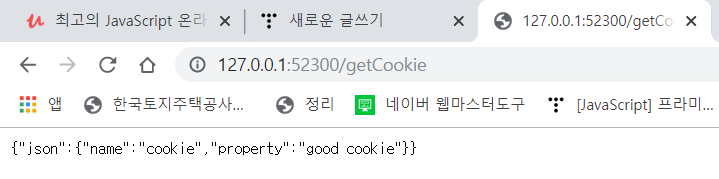
const express = require('express')
const cookieParser = require('cookie-parser')

const app = express()

// 미들웨어 설정
app.use(cookieParser())

app.get('/setCookie', function (req, res) {

  res.cookie('json', {
    name: 'cookie',
    property: 'good cookie'
  })

})

app.get('/getCookie', function (req, res) {
  res.send(req.cookies)
})

app.listen(52300, function () {
  console.log('server is running at : http://127.0.0.1:52300')
})
http://127.0.0.1:52300/setCookie에 접속하면 쿠키가 생성되고
http://127.0.0.1:52300/getCookie에 접속하면 생성된 쿠키를 확인할 수 있습니다.
cookie() 메서드의 세번째 매개변수엔 다음처럼 옵션을 지정할 수 있습니다.
res.cookie('json', {
    name: 'cookie',
    property: 'good cookie',
    httpOnly: // 클라이언트의 쿠키 접근권한 지정
    secure: // secure 속성을 지정
    expires: // expires 속성을 지정
    maxAge: // 상대적으로 expires 속성을 지정
    path: // path 속성 지정
  })
이 글은 여기까지입니다. 자주 쓰이는 미들웨어가 꽤 많아 다음편에도 이어서 미들웨어에 대해서, 여유가 더 있으면 RESTful 개발에 대해서도 쓰겠습니다.
'내가 보기 위해 쓰는 것 > Node.js' 카테고리의 다른 글
제로부터 시작하는 Node.js - 12. RESTful 웹 서비스 개발 (1) 2019.11.16 제로부터 시작하는 Node.js - 11. Express 모듈 - 3 (미들웨어 2) (0) 2019.11.16 제로부터 시작하는 Node.js - 9. Express 모듈 - 1 (0) 2019.11.06 제로부터 시작하는 Node.js - 8. 패키지 매니저 npm, 외부모듈 (0) 2019.11.06 제로부터 시작하는 Node.js - 7. http 모듈 2편 (Cookie, Request, Page) (0) 2019.11.05